Enable Live Shipping Rates at Customer Checkout – Shopify
ShipBlink extends the option for you to set up your own shipping rates or charge live carrier fee from your customers — as they are placing an order on the checkout page, based on instantaneous temporal factors. This allows you to maintain complete transparency with your customers when it comes to shipping rates.
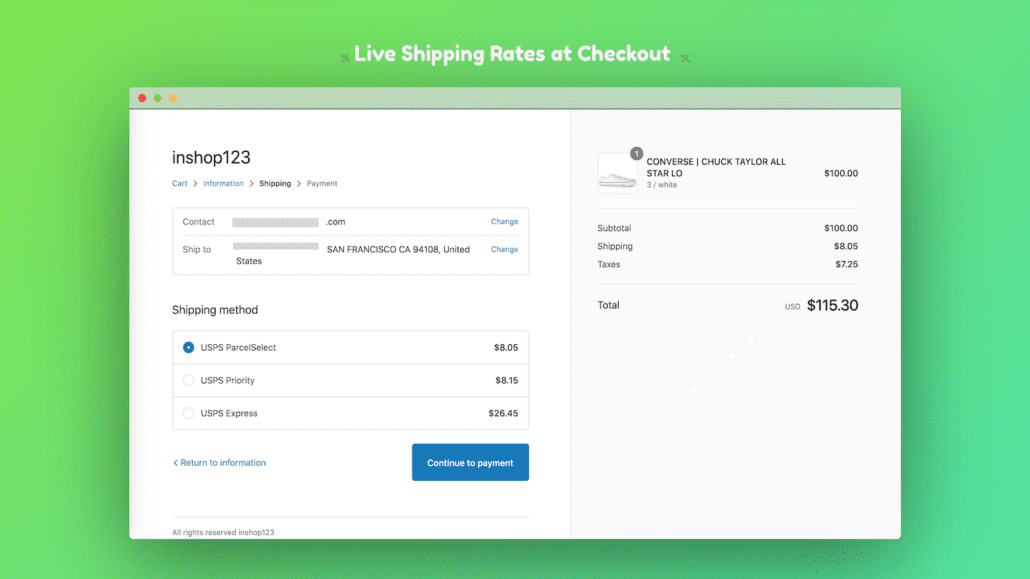
Customers have the power to choose between paying more for expedited shipping or lower for standard shipping. Additionally, you may also charge an additional fee (flat or percentage-based).
Starting 1st January, 2023, Live Checkout Rates are available on selected Shopify Plans To activate the Live Checkout Rates (third-party carrier-calculated shipping), your store needs to be on the Advanced Shopify or Plus plan. If you’re on the Shopify plan, then you can add this feature for a monthly fee or switch from monthly to yearly billing. For more information, contact Shopify Support. Without Shopify CCS, You can still use a ton of other ShipBlink features like Domestic & International Label, Manifest generation, etc.
To enable live checkout rates on your store, you would require an EasyPost account and have it integrated with desired Shipping Carriers. Refer to Setup an EasyPost account and get an API key? for the corresponding steps and head over to https://app.shipblink.com/integrations to test it out.
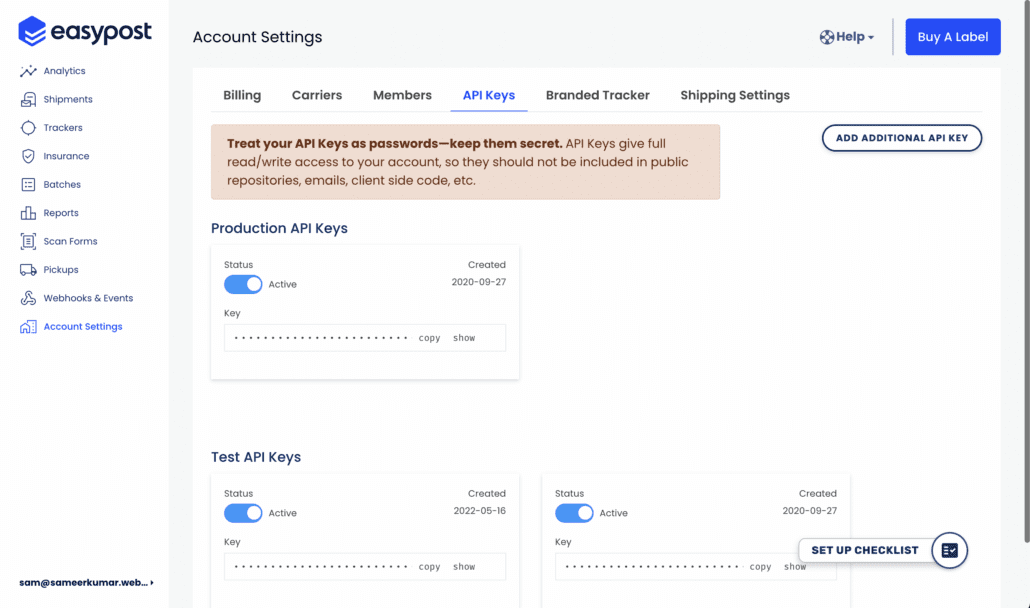
API keys generated on your EasyPost dashboard
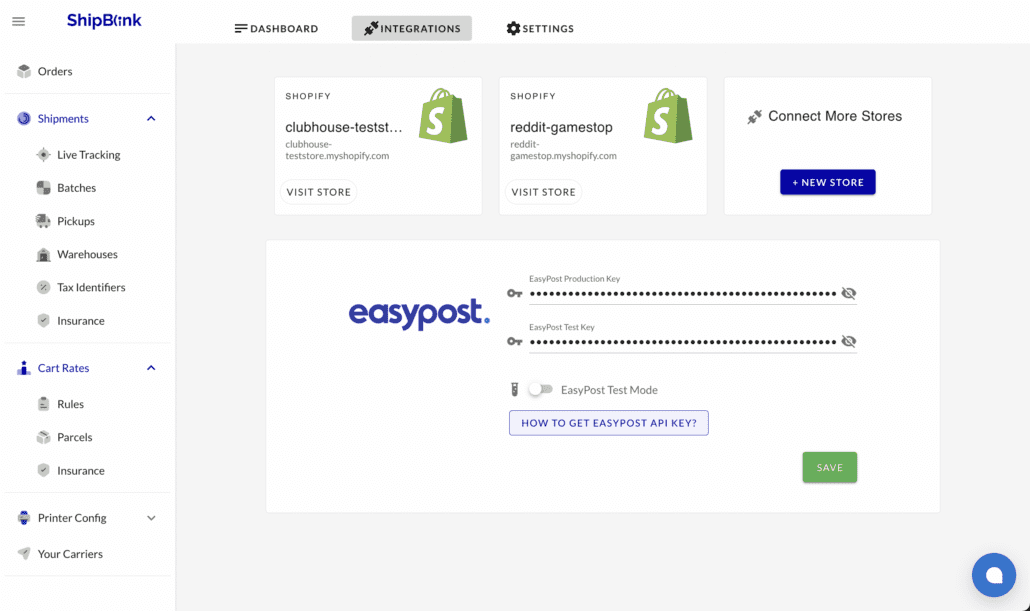
Your EasyPost API keys entered on your ShipBlink Integrations page for the initial setup
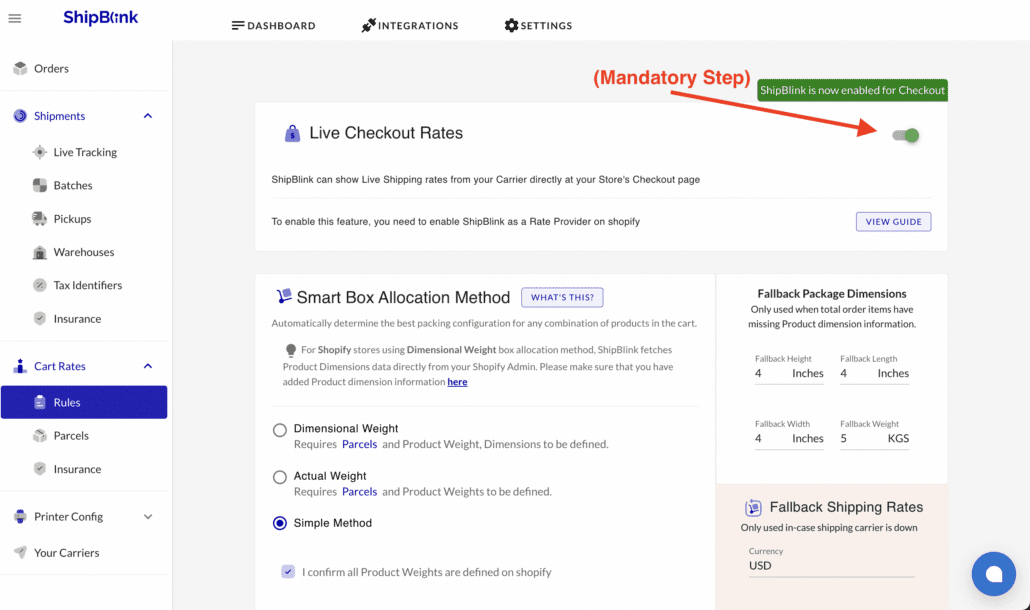
1. Enable ShipBlink Live Checkout Rates
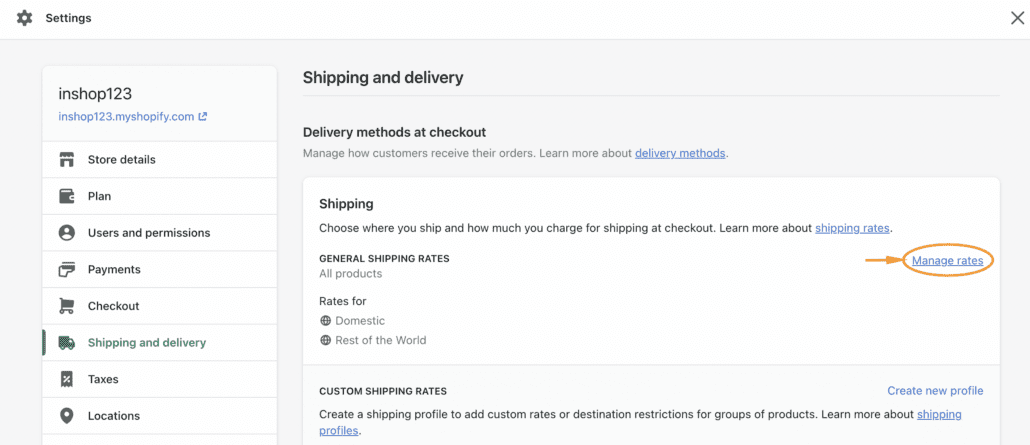
2. Go to Shopify’s Shipping and Delivery Settings
3. In the shipping section at the top of the page, select the ‘Manage Rates’ option towards the right
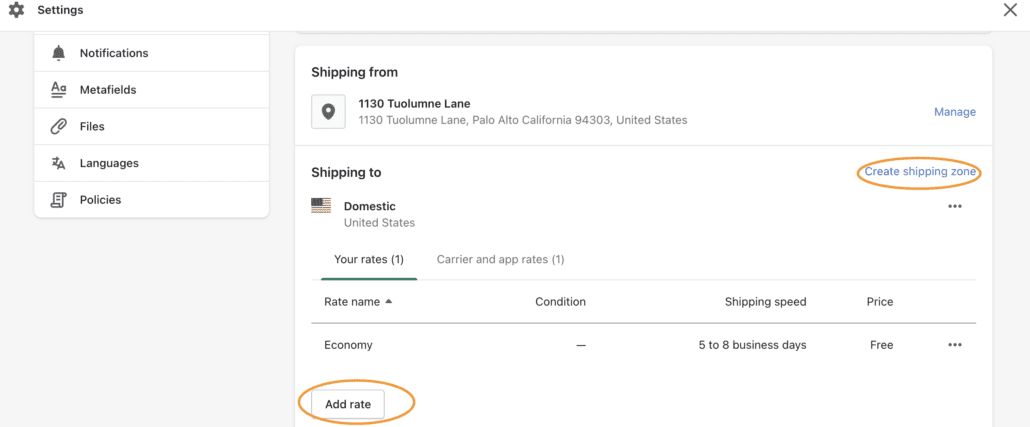
4. Select the Country/Region you would like to serve ShipBlink rates from and click on “Add rate”
5. Choose “Use carrier or app to calculate rates” and select “ShipBlink Rates” from the dropdown, and manage handling fee as per your own preference
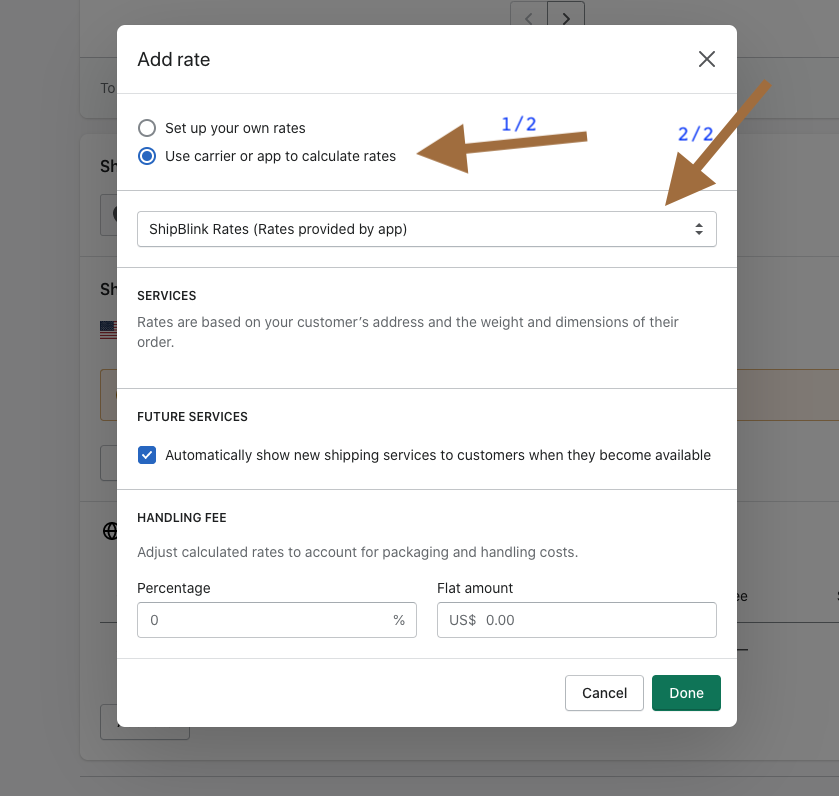
6. Finally, press on the ‘Done’ button, and don’t forget to save your settings!
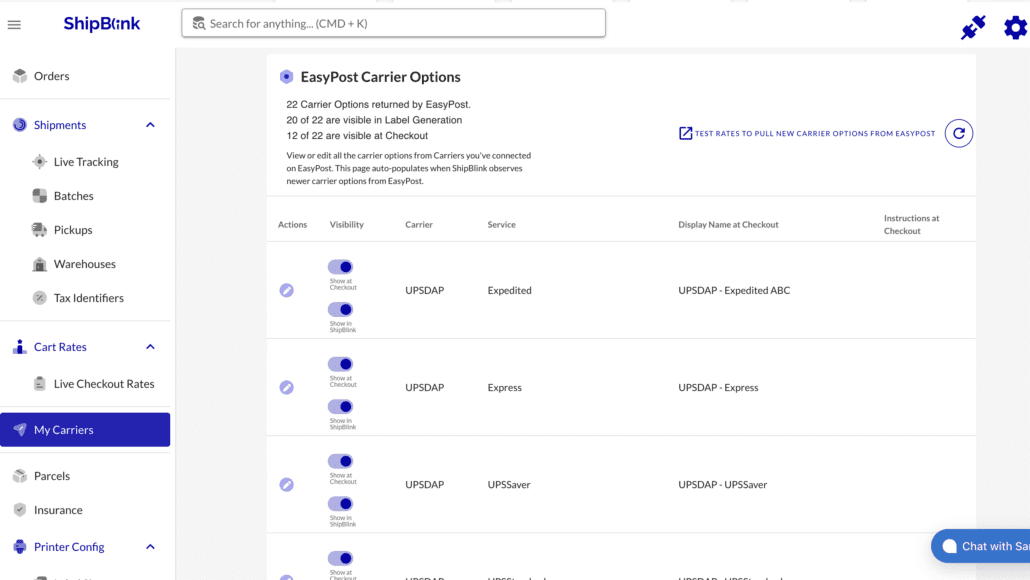
Ensure you have “Show at Checkout” enabled for all options to be shown at cart.
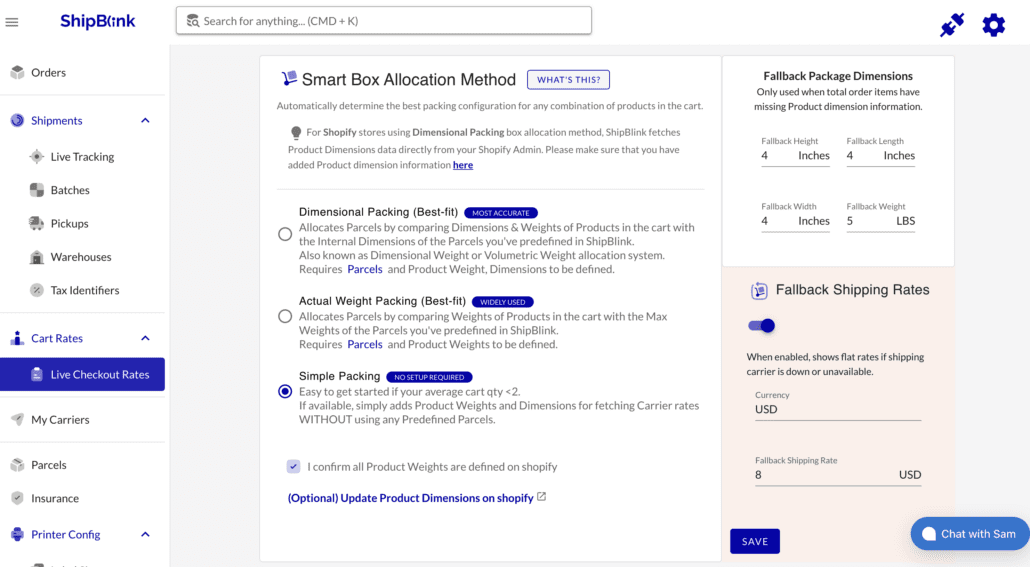
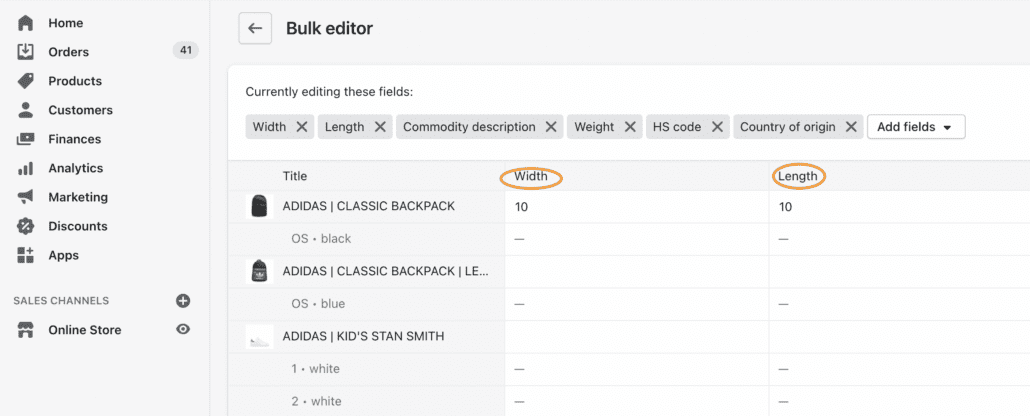
Since Shopify does not have fields to input product dimensions like Length, Width, Height, please fill the Product dimensions here in your Shopify Admin console.
- Choose a packing method (tip: Start with “Simple Packing” if you’re new to this!)
- Mention your fallback shipping rates (shipping rates used in case of Carrier outages)
- Fallback package dimensions (used when the items don’t have a defined customer experience at all times on the Checkout Settings page